Wednesday, January 29, 2014
How To Design My Landscape.
I think that I really need to sit down and get my mind on exactly what I want in my landscape and how I want to have it look.
There are several different things that I can go by in making up my mind on my design of my landscape.
1. Color
There are many different types of colors that I can use I can use tints, tones and hues. They also have complementary and contrasting color, along with primaries and pastels. All of these different types of colors are a part of the color equation. I can use a lot of the different colors or I can keep it simple, it is up to my own personal taste.
2. Texture
Texture comes in many different types such as soft, rough, smooth, prickly, fuzzy, or glossy. If I want contrast then mix the delicate with the bold, or soft with the rough. Flowers, bark, foilage, and hardscaping materials all have texture.
3. Scent
To me the sweet scent of some plants such as roses, jasmine, daphne, rosemary, or lilac are worth the effort to plant them in my landscape such as near a window and close to my outdoor seating areas. It is always nice to grow plants that are fragrant for every season, so I will be able to enjoy the scents all year long.
4. Sound
There are many different kinds of sound that I can put in my design of my landscape. Some of them are chirping of birds, the tricking sound of water from a stream, the splash of a fountain, the rustling of leaves on a windy dry, or the soft melody of a windchimes can soothe the soul and drown out distraction.
5. Touch
Touch can be with the feel of different plants as well as, the feel of polished pebbles, aged wood, and other nonplant materials.
6. Function
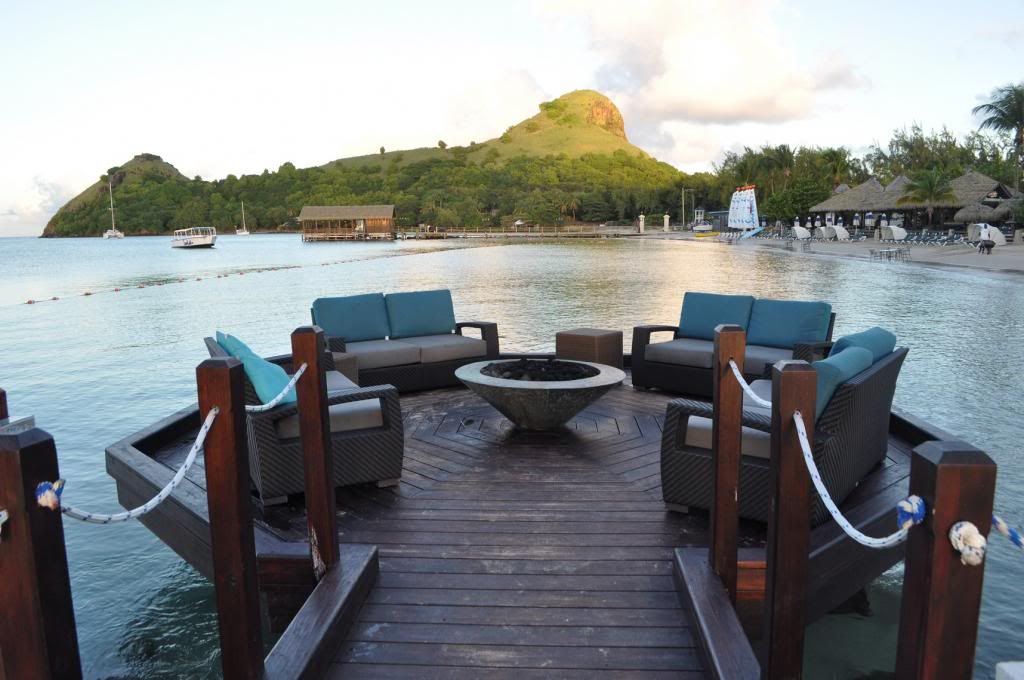
In this, I will need to figure out what I will have in this area. Always design this area with a purpose whether it will be for growing vegetables, a child's play area. I might want to make this area into an outdoor where I can have my patio set and my grill. Also some people also has a fire pit in this area.
7. Light
Always check out the patterns of light and shadows that is in my garden. For the hot summer days, I can build an arbor that can create a shady spot to relax in.
8. Pattern
There are many different designs or patterns that I can create in the garden. Some of the patterns that I can have in my garden are brick paving, knot gardens, picket fences and boxwood parterres.
9. Form
Plants may be columnar, rounded, spreading, billowing, upright or fountainlike. Hardscaping materials and garden ornaments have form too that can be used in designing my landscape.
10. Contrast
I can contrast texture, color, light and form. Contrast attracts attention and always pleases the eye. A little of contrast is soothing and a whole lot is stimulating.
11. Perspective
Perspective changes the way a garden looks, either throught a window or from a deck.
12. Motion
There are many different ways that motion gives life to my garden, such as, water running through my garden, birds flying from tree to tree, and butterflies flying over flower heads.
13. Movement
There are many different types of movements that I might have in my garden, such as having a lot straight paths or maybe curving paths. This is a situation where form follows functions.
14. Change
Always plan for changes in my garden. Perennials spread a whole lot bigger. Trees grows tall, that creates shade where the sun used to be. Welcome change to my garden and always plan for change.
15. Aspect
Remember that what is shady in one season will be sunny. All of this is a matter of personal taste.
16. Personality
Put different things that shows people what has special meaning to you, and that can be many different things.
17. Focal Points
There are many different focal points that I can use in my garden, such as, waterfalls, a container with plants in it, and many others ways.
18. Ecolory
I can grow some native plants in my garden and also invite wildlife to my garden.
19. Scense Of Places
I use different materials in my garden that makes the garden, mine. I always add my own personality, so the garden will be mine.
20 AArchitecture
Whatever I have with my house's architecture I will put the same in my garden.
Summary
There are many different things that I need to work all of them into my garden.
Landspacing Design From Nature
Nature teaches landscaping. Because there is always a element of mystery of not knowing what,s around the bend. This element of mystery is one of five intriguing characteristics of natural land spaces.
There are many different landscapes that I can write down. They can be different plants[ flowers that are blooming or find an beautiful image of foliage and bark in pen or watercolors, so I can put a natural design elements in a garden design.
The next step I need to do is to look at my own garden site. Always examine the type of soil in my garden, the available light and moisture, the slope of the ground, and any micro climates my garden may have.
Patterns: Groups Of A Single Species.
A lot of times people think that natural landscapes are chaotic and does not have much perceptible patterns. But normally the natural landscapes pattern is always there., like in an arrangement of plants.
In nature, most of the plant species are grouped with plants of the same species. This process is done because they have very specific environmental needs that can be met only in certain areas or if they need to have the seed fall near the parent as a means of reproduction results.
When I have either vegetative or seed reproductions most of the time the plants tend to form these natural 'drifts'. A drift is a group of plants with a higher density in the center and also they have a feathered edge of more widely spaced plants. In the garden this is found that they have naturalized drifts of flowering bulbs or drifts of perennials and annuals that I allow to self-sow.
A Sense Of Place. Regional Landscapes
In each region, there is always differences in soil, climate, and topography. In each region there is distinctive plant communities. Within a single site there may be many different micro habitats, such as having rocky soil and moist, cool, shady areas. Combinations of plants can go with each type of regional environment. Plant detail is abundant in nature and always should be put in a garden design.
Mystery: Partially-concealed Views.
A wild river landscape has a mysterious appeal. Because this landscape will provide intrigue and invites exp oration. If I add this type of landscape to my garden, not a big river but a small water feature than it will work out great. In a garden setting, if my bed has a curve in it and I maybe will have a patch of vegetation on the inside of the curve which will block a part of the view. So I can put a bed of low growing perennials, taller vegetation and tall grasses, perennials, shrubs, and trees if I want to use them.
Change Over Time: A Maturing Landscape.
There is always change in my landscape such as the seasonal changes that I get with new flowering, growth, changing foliage colors, seed production, and leaf fall. There are also long-term changes that are associated with the reproduction and spread of plants, all the new plants and some of the mature plants dying.
Intricacy: Details Of Bark And Leaf
The plant design in nature is real good and it should be included in my garden design. Some of the plant's details are textural mosses, fine-bladed grasses , fern fronds, lichens, slender webbing of deciduous twigs, and branches in winter and there are found out in nature.
Summary
I can get many different landscaping ideas from going out in nature and finding all the many different designs to put in my garden design.
Thursday, January 16, 2014
What Are Different Types Of Gardens Of Fire?
There are many kinds of different fires that I can have out in my gardens. Fire can be illuminating and our eyes are always drawn to its flickering flames which rushes up and then extinguish themselves only to rise again. We always like to feel the radiant heat of the flames and cherish the warmth.
There are five different fire elements that families decides on installing in their gardens for many different reasons. For some people this is a natural extension of the home. By having this I can have comfortable time outside from the very early spring through late fall. A lot of people get together around the fire and have a good time together.
Fire also goes with romance, and families with children goes with fire elements for some good, old-fashioned roasted marshmallows, s'mores, and hot dog.
There are quite a few ways to host open flames in our outdoor space. From fireplaces to torches and lanterns, the garden has a frequent companion which is fire.
A lot of people want to have a fireplace outside in their garden, as well as, having one in their house. Most of the time it is stated that the hearth is the center of the home. The outdoor hearth becomes a natural focus and the centerpiece of the garden.
I have a large patio so an outdoor fireplace is generally placed at the margin so the entire space can remain usable. Outdoor fireplaces can be constructed of brick, flagstone, or field stone and they can range from the rustic to the extremely modern.
A lot of people who have outdoor fireplaces likes to use decorations as an avenue for self-expression. Some of them use vases and plants to decorate outside as they do inside. Fire pits come in many different ways. A simple hole in the ground lined with stone is the easiest way to get a fire pit. Some people prefer a very refind design with some of life's modern conveniences. Most of the time the fire pit is placed at the center of a patio so that everybody can sit around it.
The placement of the fire pit is an important consideration. Since I have enough space that I can have a fire pit then the result can be spectacular. But sometimes people do not have a lot of space and still want a built-in feature, then they need to look to the edges of their patio.
Some people like to have wood burning fire pits and fireplaces with natural gas starters for ease of use. This requires running a gas line to the fire element. A gas emitter is operated by an out of the way valve that is easily hidden behind a loose stone in the veneer. These starters have to be installed beforehand and must be seen by a licensed professional. I will have more finish work to do once the masonry is complete.
There is one important factor to consider when choosing the materials of my custom fire element and that is the effect of high temperatures on some kinds of concrete and stone. The high heat caused by fire can damage or destroy stone. Some stones will explodes when exposed to high heat.
Fire bowls can be used in an outside garden. They can be picked up and moved which means they can be multifunctional and this is great when a family wants to relax, and eat in the same area.
Fire bowls are made out of smooth or beaten copper, and rest on a separate stand. The pedestal that holds up the bowl also conceals the fuel tank. Chimneys has been around for along time. These terra-cotta and pottery chimneys are real nice to be able to put some chairs around them and get warm.
Patios do not always have any type of fire on it. A real good way to be able to add nighttime ambiance to a gathering would be to use a lot of well-placed series of torches or lanterns. Since light seems to attract bugs so everybody should have bug repels such as citronella oil on hand.
Summary
Tuesday, January 14, 2014
How To Choose Plants For A Pond?
Plants are used in the pond performed both as an ornamental and an ecological functions in a water garden. When I am ready to start choosing the plants for my water plants, I also need to keep the ecological function of each plants that I choose some of the plants needs to include oxygenates, which are ones that help starve out algae and it contribute to a balanced environment. Another type of plants that needs to be in a pond that cover the water surface to create shade, which will discourages algae growth and this will give the fish that is in the pond some relief from the hot sun. Between one-half to two-thirds of the water surface in the pond needs to be cover with plants. Water lilies will not cover the surface area to shade the pond. That is why many people like to use floating plants to give more coverage until the water lilies have time to established. Floater plants float on the surface and they draw their nutrients from the water, they do not grow in soil at all. Frogbit which looks like tiny water lilies is a floaters . There may be a need to thin out the more-prolific spreading floaters, definitely when the water lilies and the deep-water aquatic plants come into their own.
The final category of plants for a pool or pond garden is marginal plants. They need to be submerged in shallow water so their roots are permanently underwater while their flowers and leaves emerge above the surface. These plants needs to be put in shallow water, so they need to be place on the underwater shelf around the edge of the pond. A good way to do this is to grow these plants in baskets or pots, because this way they can be divided and re potted the plants easily. Always avoid mixing different varieties in a single container. A couple of marginal plants are pickerel weed and water iris.
For every square yard of the pond, this is a formula that anybody can go by to have an ecologically balanced pond environment. They will need twelve water snails, two fish, one water lily, two oxygenating plants and one log plant. The water snails will glide along the pond surfaces and they eat plant material and algae. The two fishes help the water garden environmental by eating pests, which are flies, aphids, and mosquito larvae.
The water lily promotes pond health by caving the surface of the pond. It provides shade for the fish, prevents oxygen loss and evaporation. The bog plant will keep the pond clean and it takes care of algae because they consume the excess nitrogen and phosphates of the pond.
There are two different types of water lilies and they are either hardy and tropical. Hardy lily will grow in zones 3 to 11. The lily will bloom as long as the water temperature is above 60 degree F and the air stays above 70 degree F. In areas of the country that has cold winters, the water lily will bloom from late May into September. If the daytime temperatures stays around 70 degrees F even in the winter, the lily will bloom nearly year-around. In areas where it freezes the water lily will died down in winter and come back up in the spring.
Hardy water lilies bloom only in the daylight hours, which are from 9:00 A. M. to 3:oo P.M. and 5:00 p.m.
Tropical water lilies are frost tender in zone 10- 11, they grow like perennials and they bloom all year. In colder climates they are grown as annuals and then they are replanted when spring comes or they are dug up and brought in out of the freezing cold. The tropical lilies will start blooming after they have two to three weeks of 80 degrees F temperature. They do not do good in the Pacific northwest and other parts of the country has cool summer.
There are two types of tropical water lilies and they are day bloomers open their flowers in the morning and close in the mid-to-late afternoon. Night bloomers open after sunset and stays open until late morning or early afternoon the next days. Both kinds of tropical water lilies are fr agent. So I will plant both kinds so I can have blooms to enjoy twenty-four hours a day.
Water lotuses are able to overwinter in a climate as cold as zone 4, but they need to have some warm days before they will bloom. Lotuses are usually large plants with some like 'Alba Grandifora, will produce six to eight inch blossoms on stems 4 to 5 feet above the water surface. Mrs. Perry D. Slocum has leaves that are eighteen inches across. Charles Thomas has fragrant lavender-pink flowers on stems that stand 3 to 4 feet above the water. Do not plant lotus plants directly in an earth-bottom pond, but plant them in pots and in ponds with liners. This is done because lotus are aggressive growers.
For my garden pond, I am going to get a variety of different plants, for it along with my fish, snails, and so on.
Saturday, January 11, 2014
How To Transplant A Large Shrub?
I think the best way to move a large shrub is to water the area for a few days ahead of trying to dig up the plant. This also will help against causing stress to the plant. Another good reason to water ahead of time is the soil being moist will be easier to dig and the soil will cling to the plant's roots to maintain a real firm root ball . The place where I am going to put this plant, I go ahead and get the area ready. I figure out how big the root ball is so I can make sure I have the hole plenty big enough and I will dig the hole as deep as the root ball and twice as wide.
The tools and materials that are needed gloves, shovel, dolly or tarpaulin and a source of water.
As I am starting to cut around the root ball with a shovel, I will pry my shovel underneath the plant. I do this all around the shrub, loosening, cutting, and working it to dislodge it.
After I get the root ball loosened enough, I will pull on it to remove the shrub from the ground.
I will put my shrub on my dolly and move it to my new location.
After I get my plant to its new home, I will fill the hole with water. Then I will wait for the water to disperse before I put the plant in the hole.
While I am waiting for the water to soak in, I will then make sure my hole is not, than I will make it larger.
Then I will sit the plant in the hole, making sure it is in the hole straight and it is facing the way that I went it to face.
The next thing I need to do is to create a berm or moat, around the plant's drip line, so the water will soaks into the soil and not run off. To make a berm or moat, I will use leftover soil dug from the hole.
Water the plant well, wait for it to soak into the soil, and then water again. Then mulch around the plant to reduce weeds and to make moisture.
Monday, January 6, 2014
How To Build A Retaining Wall Using Interlocking Blocks
A retaining wall can hold back in many different places in my yard, such as a hillside. Retaining walls are not just limited to only slopes, but I can use them anywhere in my yard, such as edges of garden beds, groups of trees and shrubs or outdoor living areas.
To have a long lasting retaining wall has to be properly constructed and have a good drainage system.
A retaining wall should not be over four feet high. A small retaining wall definitely have to hold up enormous loads like 20 tons of saturated soil. Sometimes this project gets to be more than what a do-it-yourself can do. If that happens, always hire a professional builder.
Step 1
A. Start digging out of the slope so I can create a battered surface for the retaining wall. Then always allow one foot of space for the gravel back fill between the back of the wall and the hillside.
B. Put my stakes to mark the ends of the front edge of the wall and if I am going to have curves or corners. Then I will take my string and connect them all. Take your line level and adjust the string until I get it level.
C. Now I will dig a trench for the first row of blocks and the gravel sub base. The depth of the trench need to equal the height of the blocks plus 8 inches. I will use my string to make sure the trench remains level.
D. Put sheets of landscape fabric and cut them three feet longer than the height of the wall and line the excavation. Arrange the landscape fabric so they overlap by at least 6 inch.
Step 2.
A. Put a six inch layer of compatible gravel sub base into my trench. The next step is to compact it with my hand tamper.
B. Now I will lay the first row of blocks in the trench, making sure the front edges are align with the string.
C. Always check the blocks a lot of times with the level. If they are unlevel them I will need to add or remove the gravel, till I can get it level. Always sweep off the top of the blocks before I begin the next row.
Step 3
A. Start laying the second row of blocks and make sure the blocks remain level.
B. Place four inch perforated drainpipe over my gravel sub base behind the blocks. One end of the pipe has to be unobstructed so that runoff water can escape.
C. While I am adding six inches of coarse gravel behind the blocks and pack it very good, but do not crush the drainpipe.
D. Keep laying rows of block until the wall is eighteen inches high.
E. Fill behind the wall with coarse gravel and always pack it down with a hand tamper.
Step 4
A. Finish laying all the remaining rows of block, not the capstone row, always back filling and tamper as I go.
B. Fold the end of the landscapes fabric down over the gravel back fill.
Step 5
A. Following the manufacturer's instructions. apply the construction, apply the construction adhesives. Lay the capstones in place.
B. Put topsoil to fill behind the wall and in front of the base of the wall.
C. Now I can figure out what I want, whether it is sod or plants above or below the wall.
SUMMARY
Retaining walls can really change up the way my lawn looks.
Subscribe to:
Posts (Atom)